
This document allows the user to create custom Calendar layouts to organize rows into a concise summary of equipment used, tonnes moved, and grades achieved.
Manually Creating a Dashboard
- Go to Schedule --> Calendar --> Dashboard --> Gear Icon
--> Dashboard Dialog
- Hit the blue pus button to create a new dashboard
- Click in the Name field and rename the dashboard to "Scheduling".
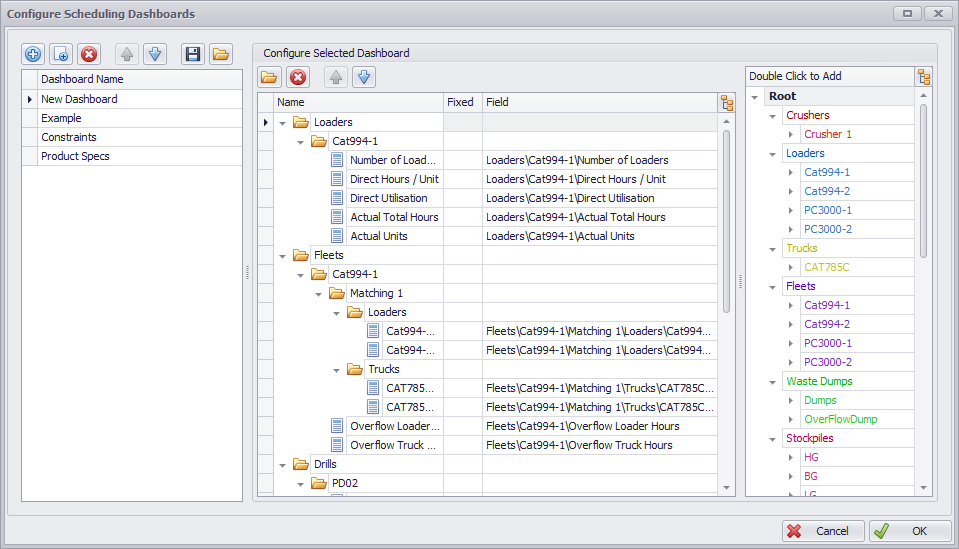
Dashboard Setup - Configure Scheduling Dashboards
- Creating Fields - Example
- On the right hand side, double click on Crushers to add it to the dashboard.
- Expand the new Crusher folder to each individual crusher.
- Delete all child fields except for Capacity and Actual.
- Double click on Loaders to add it to the dashboard.
- Expand the new Loaders folder to each individual loader.
- Delete all child fields except for Number of Loaders and Actual Units.
- Repeat for Trucks.
- Double click on Constraints to add it to the dashboard
- Expand the new Constraints folder to see each constraint
- Delete any Constraint which are not required for Scheduling
- Double click on Product Specifications to add it to the dashboard
- On the right hand side, double click on Crushers to add it to the dashboard.
- Click OK to finish
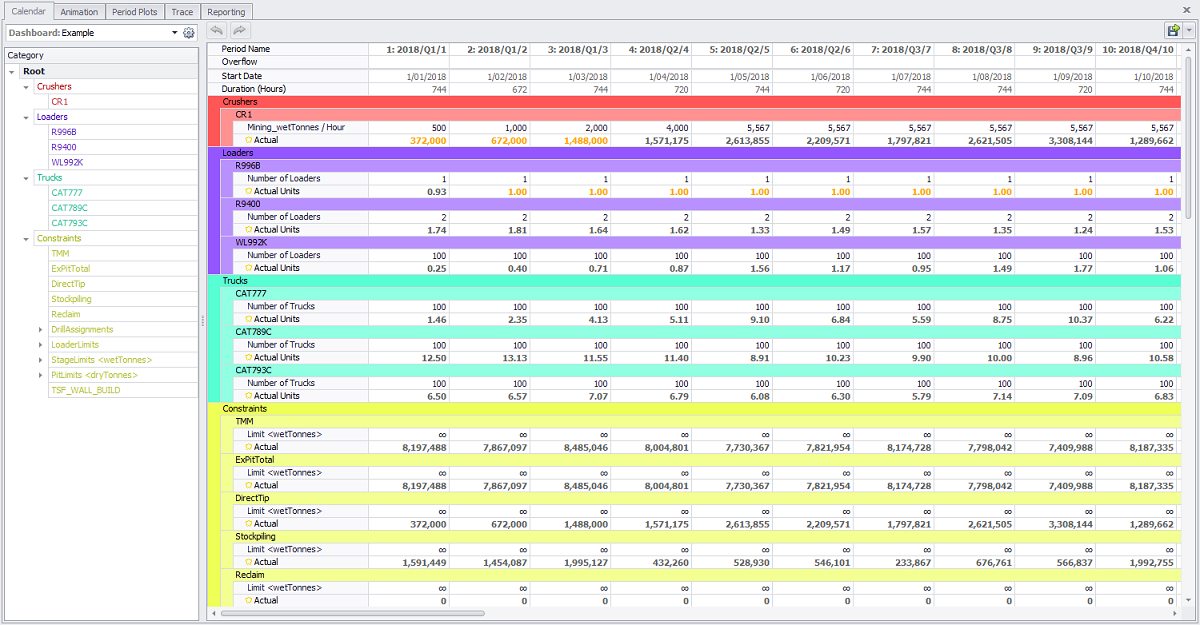
Completed Dashboard Display - Example
Creating a Dashboard from Current Selection
- Go to Schedule --> Calendar --> Category
- Holding CTRL, select the fields that you want in the new dashboard
- Click the Gear Icon ,
- Click Create from Category Selection. This will automatically create a new dashboard based on the selected items.
Configure Scheduling Dashboards from Current Selection
Want to learn more?
Online Help Manuals - Click here for the latest version
Learning Management System - Click here to login or here to request access
Comments
0 comments
Please sign in to leave a comment.